Photography
Taking Landscape Photos
If you are reading this, you want to know how to take good landscape photos. One really important thing before we start: if you want to take good landscapes, you have to really want them to be good. You’ll understand this more as we go along.
So, first things first: Lighting. If you can catch a ray of sunlight, you have the makings of a good photo. Like here: (sorry, digital error on camera) This is just plain old snow next to a fence that is facing the school. See how amazing it looks?
Second, texture. Do your best to get a repeating pattern in the picture, say, a fence. It will make it look more 3D.
Third, choose your theme. For example, if want an ironic picture of, say, a bush, but instead of a bush you want to make it look like a tree on a snowy hill, get close enough to make it look huge, instead of small, and take it in winter.
So, there you are. With these three key points, you are well on your way to capturing a beautiful landscape. If you feel like sharing your photos, and even if you don’t, and also if you want some constructive correction, email me your landscapes at: [email protected].
Javascript
Java Script Lesson 1: Rectangles
By: Danny Fulton & Marissa Ho (This is a joint one)
What is Javascript, you ask? Answer: It is a techno version of drawing, an animation go-between, and, for those who want it, a game creator platform.
To start with, we will make a rectangle. Danny, what’s the command? Thanks, Marissa. Ok, so, let’s say we have a 400 pixel by 400 pixel screen. A pixel is the 1 of coding. It is what determines what the numbers in the code are. So, here is the command. Say we want to make it in the top left corner. The command is: rect (0, 0, ?, ?); Now, hold on, what’s with the question marks? Well, we don’t know the dimensions yet. Well, how about 10 by 10? Ok, then its going to be:
rect (0, 0, 10, 10); That’s pretty tiny! Well, of course it is! The screen is 400 PIXELS BY 400 PIXELS!!! 10 is 1/40 of it! That’s tiny, given how many pixels are on a screen! Oh. What if we made it 123 by 123? Then it would be big! Oh yeah, I forgot! The top left corner of the rectangle is where the x and y are determined. Another thing is that the numbers determine things and this order: x , y, width, height Thanks for the help Danny! Now I can make a picture. And please teach me more later! You’re welcome, and sure! See you readers next time! Bye!
Webpage for code areas: Khan Academy
To make a program, either make an account to update it, or create a new program if it is just a one time project.
Paper Hot Coco Mug
Hello there, I’m Danny. Today, I am going to give you a printable design you can use to make a paper mug. In this article, I will teach you how to put it together, so you can have a hot chocolate party without burning your tongue!
First off, cut out the leftmost part of the printout, the one with all rectangles. Thats your base for the mug. Then, fold the black lines so it can become a rectangular prism without a top. Now, on your extra flaps, put glue and attach to the adjacent side.
So now, how do you hold the mug? I’ll tell you. On the other cutout area, cut it out. Then, cut where it tells you to into the cutout. Now, fold on all connecting lines. Repeat the final base step on this, but only on the actual grabbing area. Now, fold out the flaps on the paper beams connecting the grab area to the mug base. Glue to one side of the mug (except for the bottom) and have a coco party!!!
Since this is the first how to, I want to express the importance of paper folding. First of all, it develops hand-eye coordination and the fast twitch muscles in the hands. Second, and most important, it is one of the best ways to express creativity. Drawing is nice, but folding really allows child and adult minds inventive and creative worlds and ideas to take 3D shape. Why, I would bet that the next Einstein will have folded paper into 3D shapes at one point!
If the directions does not make sense, email me at: [email protected] Your feedback helps a lot. Also, to get a chance to vote for the next creation I make, go to the poll here. Thanks for reading!

Dungeon Master in Dungeons and Dragons
Being a dungeon master is fairly straight-foward: Make a map, lead the players through the dungeon you create, try to injure them gradually but not defeat them immediately, and give them some good loot. If you need help with making a dungeon, here is a layout you can use.
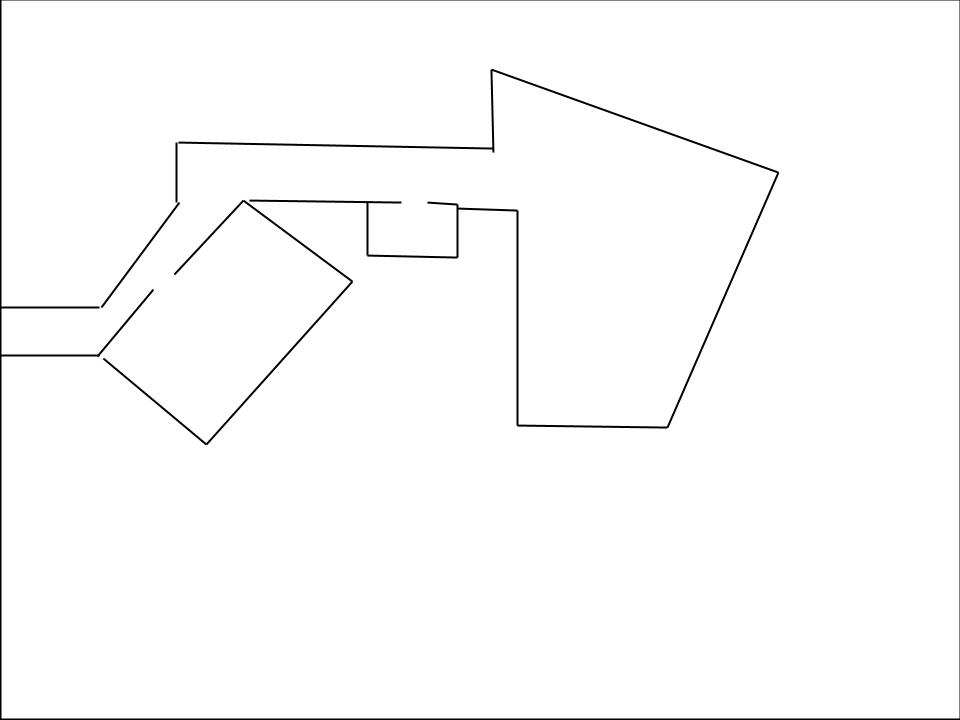
Decide what is in the rooms yourself! Remember: tell a story with it!
